Welcome to the world of yoga, where each pose is a unique expression of your body and spirit. Whether you’re just starting your yoga journey or have been practicing it for years, the beauty of yoga lies in its ability to meet you exactly where you are. In this article, we will explore a variety of yoga poses that can be adjusted to suit your current level of flexibility. From gentle modifications for beginners to deeper variations for the more advanced practitioners, these poses will help you find your flow, strengthen your body, and nurture your soul. Read on to know more about them!
1. Warrior Pose
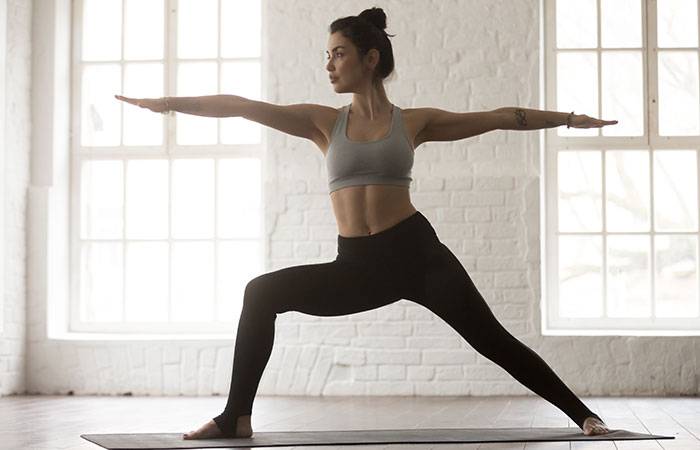
Image: Shutterstock
Stand with your legs apart and place your hands on your hips. Bend your right knee at a 90° angle while extending your left leg out to the side. Raise your arms to shoulder height and face the right.
- Beginner
If you’re a beginner, focus on positioning your legs and gently stretching the left leg backward without lowering your body too much. You can place your hands together in front of your chest.
- Advance
As you progress to an advanced level, aim to keep your right knee bent at a right angle and lower your left knee until it touches the floor. Raise your arms above your head and keep them straight, pressing your shoulders down.
2. Tree Pose
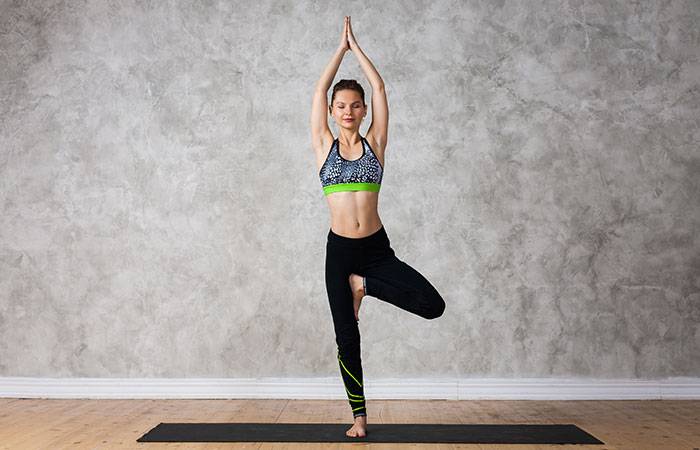
Image: Shutterstock
Stand with a straight back, facing forward, and shift all your body weight onto your left leg. Lift your right knee and place your right foot on the inside of your left thigh. Bring both palms together at the center of your chest.
- Beginner
If you’re a beginner, start by placing your foot below the knee until you feel comfortable maintaining balance.
- Advance
Once you’ve mastered the basic posture, challenge yourself by closing your eyes and raising your hands above your head.
3. Downward Facing Dog Pose
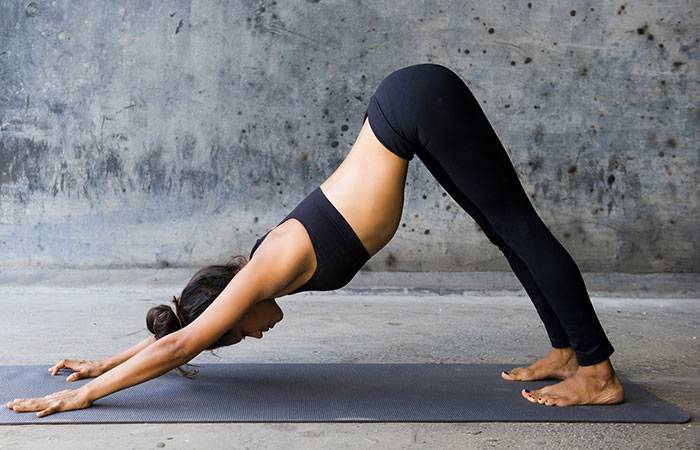
Image: Shutterstock
Position yourself with your knees and hands flat on the floor without bending your elbows and with your back straight. Gently lift your knees, resting your heels on the floor. Raise your hips and lower your head without bending your elbows, creating a triangle shape with your body. Hold the posture for a few minutes and then return to the original position.
- Beginner
If you’re a beginner, it’s okay to have your legs slightly bent or if you rest your forearms on the floor.
- Advance
As you progress, challenge yourself by raising one leg and leaning on the palms of your hands and the toes of your feet that are on the floor.
4. Reverse Table Pose
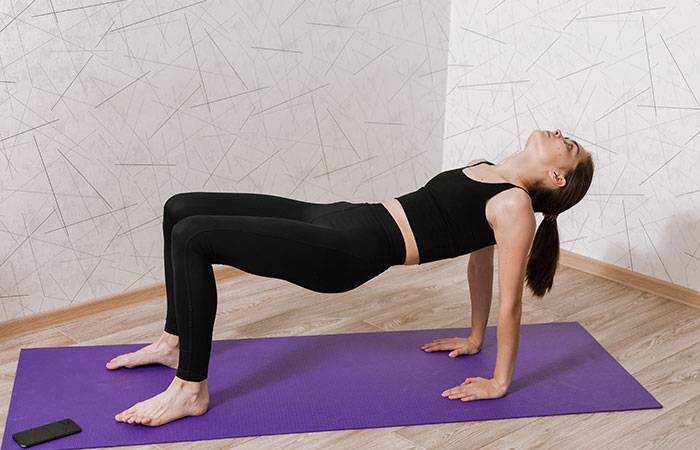
Image: Shutterstock
Sit on the floor, bend your knees, and place the palms of your hands behind your hips. Raise your hips to form a straight line from your head to your knees. Hold the posture while taking a few deep breaths. Return to the original position.
- Beginner
As a beginner, you can perform this pose by slightly raising your hips off the floor.
- Advance
Once your arms and shoulders can support you smoothly, you can stretch your legs forward without bending your knees, leaning on the back of your heels to lift up your hips and torso.
5. Cobra Pose
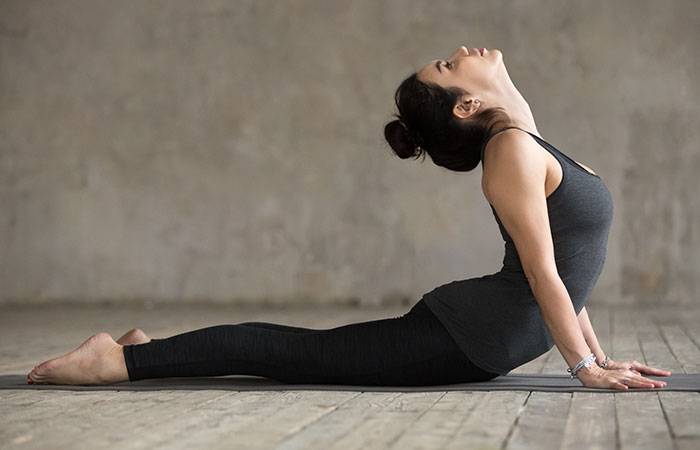
Image: Shutterstock
Lie face down on the floor and place the palms of your hands on the floor at shoulder level. Gently stretch your arms, raise your head, and slowly arch your back. Hold the posture for a short while and return to the original position.
- Beginner
For beginners, you can rest your forearms on the floor and arch your back slightly.
- Advance
As you advance, stretch your arms without bending your elbows. Arch your back as much as possible, and look straight ahead, keeping your neck straight.
6. Revolved Side Angle Pose

Image: Shutterstock
Stand, take a big step forward with your right leg, and bend your knee. Lower your body, keeping the left leg straight back. Interlock your hands and turn your torso to the right. Press the right knee with the left elbow, without separating the hands. Hold the posture for a short while and repeat on the other side.
- Beginner
Beginners can leave the left leg bent with the knee resting on the floor.
- Advance
More advanced practitioners can stretch both arms, passing the left arm in front of the bent leg, resting the palm of the hand on the floor, and raising the right arm up and forward with the right leg stretched backward.
7. Revolved Abdomen Pose
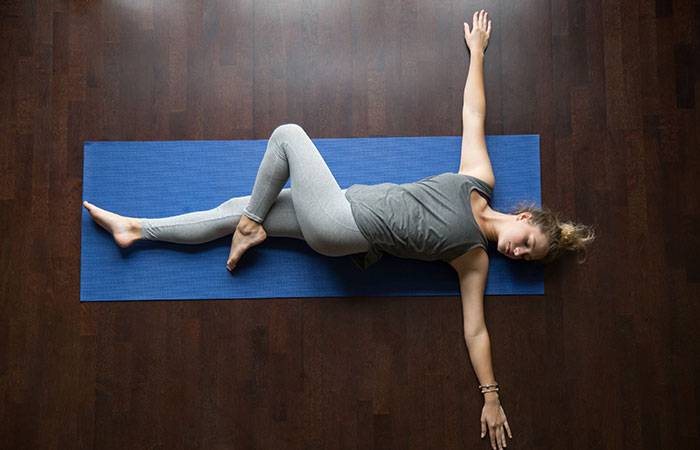
Image: Shutterstock
Lie face up on the floor and open your arms at right angles to your body. Bend your knees and raise your legs so that they are at a right angle. Bring your knees to the left, without moving your upper body, and hold them with your left hand. Hold the posture for a few seconds and repeat on the other side.
- Beginner
Beginners can place a cushion or a folded blanket between their knees while keeping their arms outstretched.
- Advance
Advanced practitioners can extend their legs to the side, bringing them toward their shoulders and holding their toes with one hand.
8. Child’s Pose
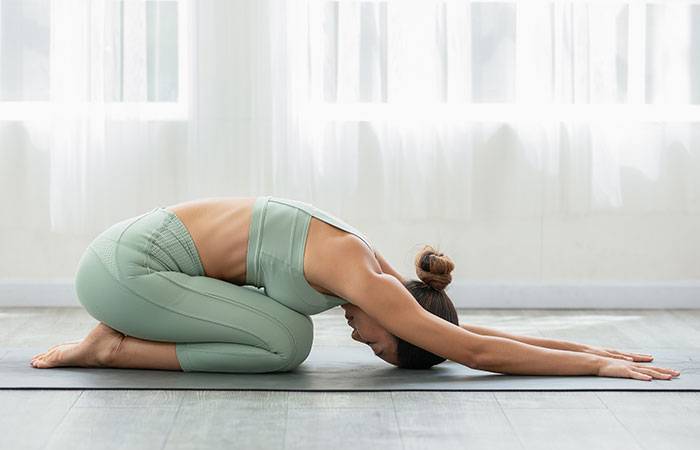
Image: Shutterstock
Position yourself with your knees and hands flat on the floor, without bending your elbows and keeping your back straight. Slowly bring your torso down, resting your buttocks on your heels and leaving your arms stretched forward. Rest your forehead on the floor and hold this relaxing posture for a short while before returning to the original position.
- Beginner
Beginners can make the pose easier by placing a folded blanket or a cushion on their mat and resting their torso and head there, with their forearms on the floor.
- Advance
As you become more flexible, you can perform the posture with your buttocks resting on your thighs and your arms extended backward, with your palms facing upward. Lean your torso down, resting your forehead on the floor.
9. Camel Pose
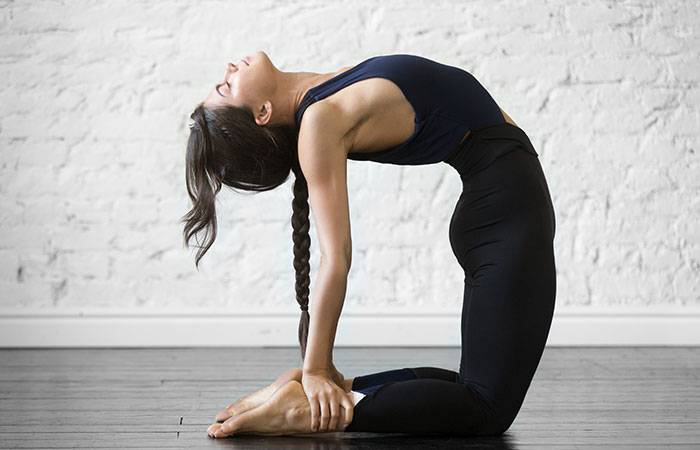
Image: Shutterstock
Place yourself on your knees on the floor with your back straight and your arms at the sides of your body. Then, bring your right arm back and touch your right ankle while arching your back and looking up. Bring your left arm back and touch your left ankle. Hold the posture for a short while.
- Beginner
Beginners can focus on bending the back as much as they can while placing their hands on their lower back.
- Advance
Advanced practitioners can place their hands on their heels, pushing their thighs forward and pulling their head back to form a deeper arch.
To make the most out of yoga, remember to listen to your body, go at your own pace, and adjust each posture to your own flexibility level. With regular practice, you will gradually improve and become more comfortable in each pose. Enjoy your yoga journey!
The post 9 Yoga Poses That You Can Adjust Based On Your Flexibility Level appeared first on STYLECRAZE.
This content was originally published here.


