


I went from questioning kombucha, to loving kombucha, to making my own kombucha recipe—with a few road bumps along the way.
Fear is born from ignorance, and before I understood what kombucha is or how it’s made, I was skeptical—if not terrified—not just of making it, but trying it.
At over four dollars a bottle at the grocery store, and more at the local corner bodega (do you know how many heirloom tomatoes that can buy?!), kombucha had never been something I was tempted to splurge on. I thought of it as a drink that was, mysteriously, appealing to both hippies and socialites. It often involved chia seeds, and I was absolutely not interested in that. Moreover, my friend Rebecca was brewing her own, and her SCOBY (the whiteish liver-like mass that is the yeast and bacteria “mother” of the fermented tea) looked more like an exhibit in a museum of medical mysteries than something that belonged in a beverage.
But when I finally decided to taste kombucha, I understood the fuss: With its sharply sweet vinegary flavor, kombucha is everything tart and delicious about shrubs, but more sippable—and fizzy! (There are lots of purported probiotic health benefits, too, but I was less interested in that aspect and more interested in an improved taste, in saving money, and in having a pet project of my own.)
I decided to go the DIY route and make my own kombucha at the Food52 offices. I was scared at first. Actually—fueled by my uncertainty about what to expect—I was scared throughout most of the process. And since I was embarking on a new project in front of my colleagues, the endeavor was particularly high-pressure. The editorial team watched me tear up when I had to throw away an entire SCOBY due to fly infestation; they dealt with my frantic text messages and emails, my constant sighing, and head scratching.
Was it worth it in the end? Yes. Not only for the bottles of kombucha in the refrigerator (which, for the record, taste much better than even the fanciest store-bought varieties), but for the feeling of accomplishment. This became “Sarah’s project” at the office—my legacy. Evidenced by the length of this post, I clearly learned more than I expected, including a whole new lexicon of words and phrases like “‘booch,” “starter,” and “second fermentation.”
If you start searching for information on making your own kombucha recipe, you might find yourself going down a rabbit hole. Hey, maybe you’ll see me down there! There are a million ways to brew kombucha and a million tips for how to get the tastiest brew possible. I’m going to explain what worked (and didn’t work!) for me, but I’m sure I’ll be experimenting and refining in the future.
a few basics before you start
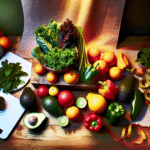
Kombucha Recipe Ingredients
Fermentation
Kombucha is just one of many fermented food and beverage products we consume these days: Think yogurt, sauerkraut, pickles, and other gut-beneficial edibles. “Kombucha is sugar-sweetened tea fermented by a community of organisms into a delicious sour tonic beverage, sometimes compared to sparkling apple cider,” writes Sandor Ellix Katz in his book, The Art of Fermentation.
SCOBY stands for “symbiotic culture of bacteria and yeast” and is an essential ingredient used in the fermentation process for kombucha. The SCOBY is a key player, but it is not cute. Picture a rubbery flat disc. That’s SCOBY. It’s dense and opaque and smells like vinegar. Even kombucha-lovers will be a little skeeved out by SCOBY, but it’s all part of the process.
Starter Tea
Starter tea is kombucha! It’s kombucha used to make more kombucha. As long as your kombucha has live, active cultures in it, it’s usable for a new batch. If you drank all of your homemade kombucha (because why wouldn’t you), you can also use store-bought kombucha. In a few paragraphs, I talk about using a combination of SCOBY and store-bought kombucha to make my own.
Supplies Needed for Making Kombucha Recipes
You’ll need a four-quart pot to brew your starter tea.
Large, wide-mouth, glass jars will house your SCOBY and kombucha while they ferment.
Towels cover your jars and protecting them with fruit flies—while still giving the kombucha the air circulation it needs.
4. Rubber bands
These hold said tea towels in place.
5. Glass bottles
These glass bottles will house your kombucha during its second fermentation. Make sure to choose ones with plastic lids that close tightly. (Tip: You can reuse old, store-bought kombucha bottles!)
6. A plastic bottle
To help measure the carbonation levels of your kombucha during its second ferment (more on that later!).
For straining your finished ’booch.
1. Gather Your Ingredients
Here’s what you’ll need:
3. Make sweet tea
Steep the tea bags in boiling water for 20 minutes (or longer) and completely dissolving the sugar. Let the tea cool completely to below 90°F (or roughly room temp) and pour into a big canning jar. Otherwise, the cultures in your SCOBY to-be might be harmed or killed by the heat.
3. Jar your SCOBY:
Pour the cup of prepared kombucha (bits of SCOBY and all—that’ll help along your SCOBY to-be) into the canning jar. Cover with the piece of fabric, then secure with a rubber band or two.
4. Put it Away
Store your covered jar in a room-temperature area that’s out of direct sunlight. It helps to put it in a hard-to-reach kitchen cupboard that won’t get much traffic for a few weeks. You’ll keep the jar there for two to four weeks, checking the SCOBY every few days until bubbles form on the surface of the tea, a thin, whiteish, jelly-like film forms across the top of the liquid, and the film becomes almost fully opaque in color. The SCOBY is ready when it’s grown into a ¼-inch-thick puck. If you see bubbles forming at the top of the liquid throughout the process, especially in the later stages of SCOBY-formation, that’s a good sign of carbon dioxide development, indicating that your SCOBY’s a healthy fermentor.
5. That’s It!
Your SCOBY is now ready to be used in your first batch of kombucha.
How to Make Your First Batch of Kombucha
1. Brew Tea
Bring 4 cups of water to a boil in a 4-quart pot. Turn off the heat and add 6 to 8 tea bags. Steep for 20 minutes, stirring occasionally.
2. Sweeten It
Remove the tea bags and add 1 cup of organic cane sugar and a half-gallon (8 cups) of cold water. Stir to dissolve the sugar granules.
3. Transfer to a Jar
Pour the cool tea into a glass brew jar (the biggest jar you can find—a 2- to 3-gallon jar is best), then add 1 to 2 cups of cold water. It’s important that your tea be close to room temperature by the time you add the SCOBY—warm tea might harm it.
4. Add the SCOBY
When the tea is below 90°F (which it almost surely will be at this point), pour in the SCOBY and 1 ½ to 2 cups of the starter liquid that the SCOBY arrived with (or, if this is your second time around, that the SCOBY was stored in after you bottled the brew).
If your SCOBY didn’t come with enough liquid, you can supplement with plain/original-flavored, store-bought kombucha (or leftover liquid from your homemade SCOBY). The first time I brewed, I used the liquid that the SCOBY came with as well as 1 ½ cups of Health Ade Original Kombucha because I was nervous. The SCOBY seemed to grow very quickly with the help of the starter liquid.
5. Cover It
Now that your SCOBY is in the tea, you have to cover the jar so that the precious SCOBY is neither vulnerable to contamination nor suffocation.
6. Wait & Watch
Once your SCOBY is in the sweetened tea—shrouded comfortably with a tea towel and living in a location that’s under 90° F with good air circulation and little direct sunlight—it will be 1 to 4 weeks until it’s ready to drink.
7. Try it!
After one week, gently push the SCOBY aside with a straw and take a sip of the liquid. If it’s as tart as you’d like, you’re ready to proceed to the next step. If you want kombucha that is sharper and more vinegary, allow the tea to ferment for more time. I found that I liked how our kombucha tasted after 10 days of fermentation.
8. Transfer Your SCOBY
When you’re happy with the flavor, move the SCOBY to another large jar with 1 ½ to 2 cups of the brewing liquid (this will be the SCOBY’s home, and you’ll use that liquid to start the next batch). Cover with a tea towel and rubber bands, just as you did before, and set aside.
9. Collect bottles
These should be glass bottles with plastic tops, such as old kombucha bottles or flip-top brew bottles. When the tea is transferred to smaller bottles, it enters a second fermentation and becomes “drier” (less sweet) and—this is fun—carbonated.
10. Flavor & Bottle
Once you have several suitable empty bottles, you’ll also want to think about flavors. Thrilled that the kombucha was fly-free, mold-free, and good-tasting, I was happy to leave it as is. But my colleagues helped me realize how fun it can be to play with flavors (see more about that below!).
You’ll want to fill your bottles almost to the very top. The fuller your bottles are, the more carbonated they will become. If you see your bottles are vigorously bubbling, you can “burp” them by opening the tops to release a bit of pressure.
11. Wait & Enjoy
Once the plastic bottle is very firm—this took about 3 days for us—move all of the bottles to the fridge, where they’ll stop gaining fizz. (I prefer to err on the side of caution, so I was eager to refrigerate the bottles sooner rather than later.)
When you’re ready to drink the kombucha, open a bottle under a bowl or in the sink to avoid getting soaked from over-active carbonation. If you’re going to be unappetized by strands of SCOBY and bits of your flavorings (or if you’re serving this to people who have never tried kombucha before), you can strain the drink through a fine sieve to get a more homogenous beverage.
How to Make Different Flavors of Kombucha
It’s important to remember not to go too crazy with the add-ins: Introducing additional sugar in the form of fruit or fruit juice during this second ferment might result in too much pressure build-up and a consequent explosion.
Here are the flavors I’ve tried so far, and what I used to achieve them:
To flavor your kombucha recipe, add your flavorings of choice during the bottling stage.
This content was originally published here.